|

Zoanthus, aka Polyp Coral, Button Polyp or Zoos are among the most popular & easiest
to frag corals in the reef keeping hobby. For those of you new to the hobby, “fragging” simply refers to breeding
or propagating your coral. Why frag your Zoanthus colony? There are many reasons, including selling the new colonies back
to your local fish store (many of which will supply the live rock), trading colonies with other hobbyists, spreading new colonies
throughout your tank, or just for the challenge. Seeing new polyps emerge from a new colony is a very rewarding experience.
Although there are several methods of fragging Zoos, I will discuss the two most common methods, both of which I’ve
had success with.
The first & easiest method is to place the live rock you intend to start your new colony as
close as possible to the parent colony. After a month or two, assuming the parent colony is healthy, you should start to see
a few new polyps on the new live rock. . Unless you plan to keep the new colony next to the parent colony, the new colony
should be moved either to a grow out tank, or to another part of the tank. If you wish to start another colony, repeat the
above procedure. A word of caution, this fragging method can & often does occur unintentionally. If you place two colonies
too close to each other, the stronger colony will quickly overrun the weaker colony. I know this from experience (see picture
below)

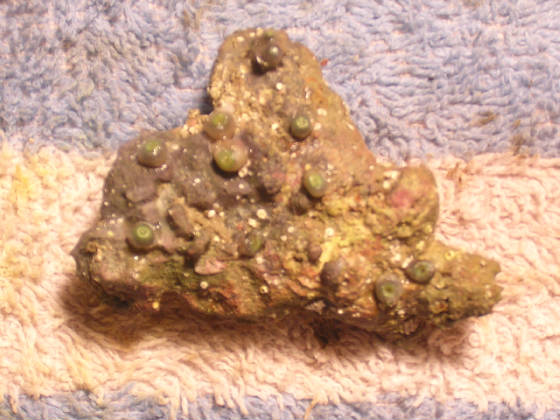
This was once an awesome pink button polyp colony, until I fell asleep at the wheel & allowed
it to be overrun by another colony. One of many huge rookie mistakes I‘ve made..
The next method is a bit more complicated, but not impossible. This method involves removing the
parent colony from the tank, cutting off a few polyps & gluing them to a new piece of live rock. The tools needed for
this procedure are as follows: one very sharp utility knife, one pair of tweezers, one dry towel, one dry paper towel, one
container of super glue (gel type seems to work best), one small bowel containing water from the tank the parent colony resides,
enough lighting that you can see what your doing & the live rock you intend to start your new colony on. Once the parent
colony has been removed from the tank, your now up against the clock. Don’t get me wrong, this procedure should never
be rushed, but keeping the parent & new colony out of the water for more than 10 - 15 minutes will create more stress
& lengthen the recovery time. Always have the tools listed above laid out & within reach BEFORE the parent
colony is removed from the tank (I know this is an obvious point, but still worth mentioning. Trust me, you don‘t want
to begin making cuts & then realize you forgot where you put the darn tweezers!) Below is the step-by-step procedure I
use most often & have been fairly successful thus far.
1. Remove the parent colony & new live rock from the tank & place on a dry towel.
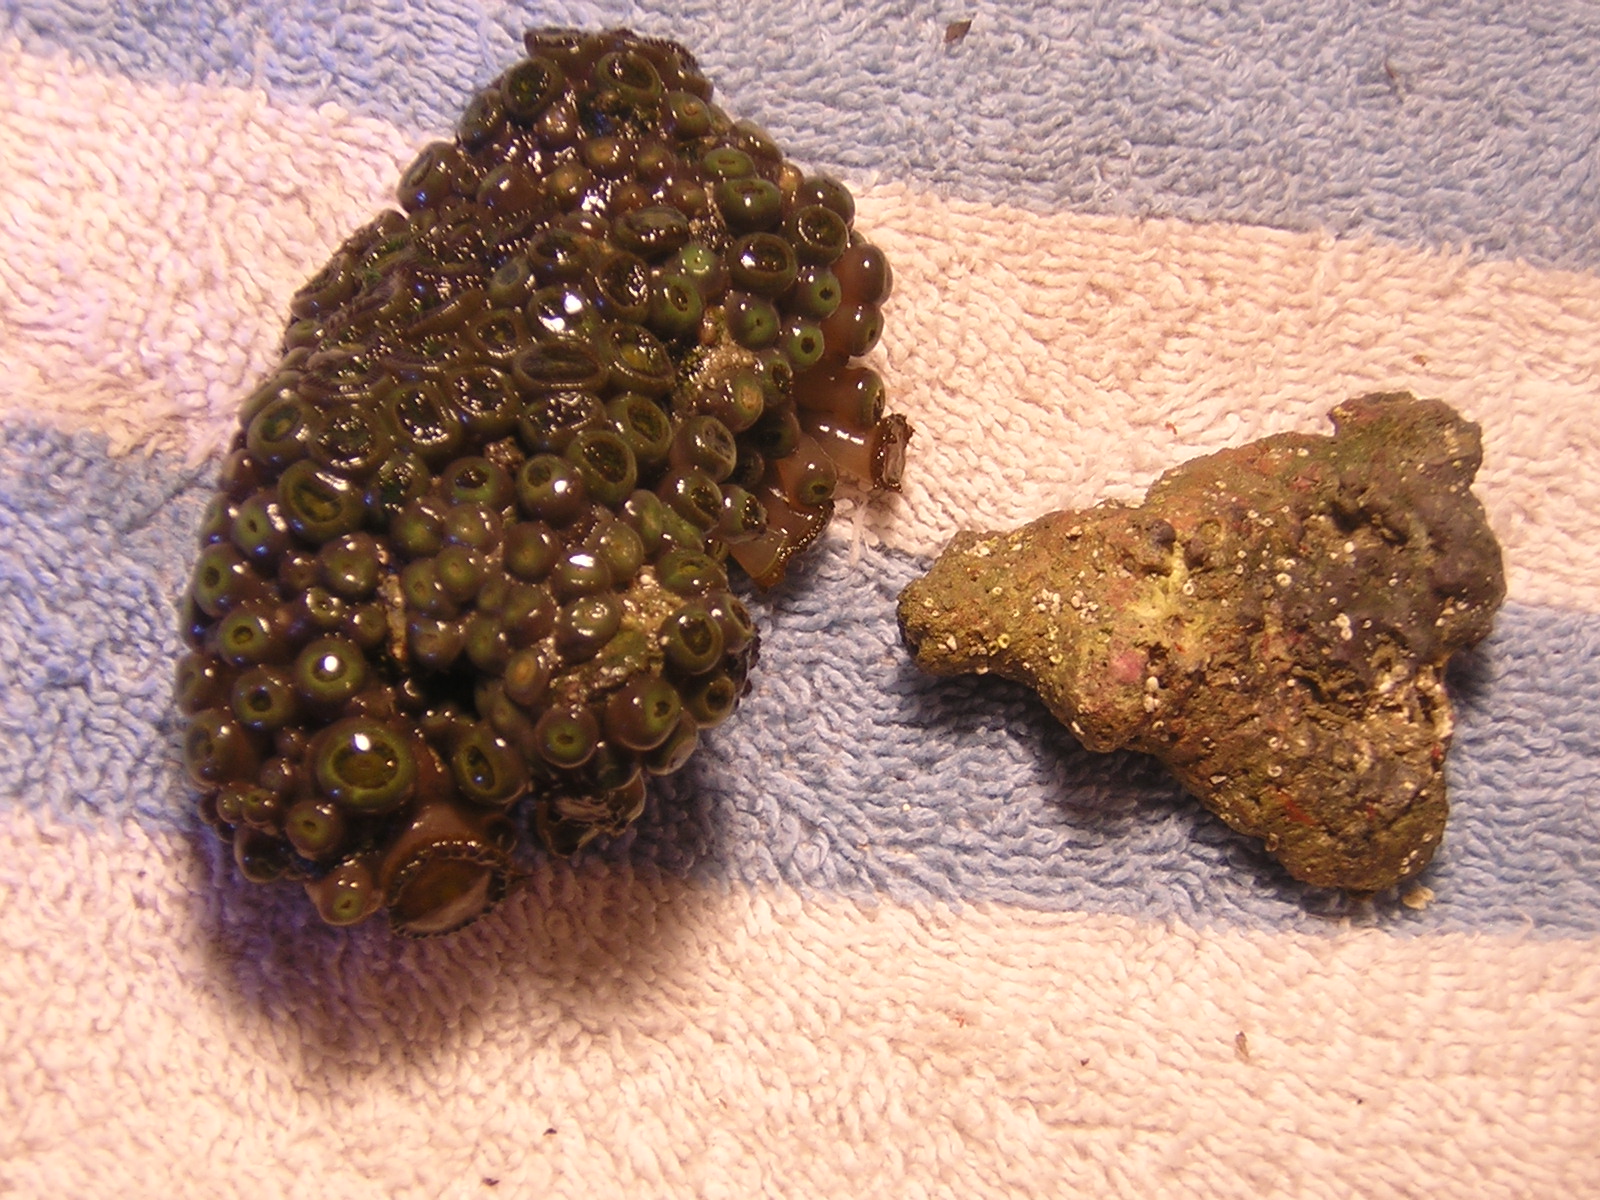
2. Using a dry paper towel, pat the area of the rock you wish to attach the new polyp.
3. Using a sharp utility knife, carefully cut the polyp off as close as possible to the parent rock, while securing the
polyp with a pair of tweezers. This is the most difficult part of the procedure & it‘s not uncommon to loose a few
polyps.
4. Once the polyp has been removed, place it in the bowel containing water from the parent colonies tank.

|
| Although the polyps may appear to be torn up, they are extremely resilient. & most will survive. |
5. Repeat this procedure until you harvested the desired amount of polyp (If this is your first fragging attempt, four
- five polyps is a good start.)
6. Place the parent colony back into its tank.
7. Using a pair of tweezers, Remove the polyp from the bowel & pat the bottom of the polyp with a dry paper towel.
Apply a small amount of super glue to the area of the rock you intend to attach the polyp & place it onto the rock. Repeat
this procedure for each polyp.
8. Allow the glue to dry for about one - two minutes & return your new colony to the tank.
The process is now complete, although I have a few more tips to help increase your chances of success once the colonies
have been returned to your tank:
1. Add a small amount of iodine to your tank. This will help to speed up the healing process for both the parent colony
& new colony.
2. Some of the newly harvested polyps will look good & others, not so good. Attach the seemingly healthiest polyps
first. Using a separate piece of live rock, attach the remaining polyps. When a polyp looks completely torn up, it can be
tempting to discard these polyps, however their probably more resilient than you think. You have nothing to loose, right?
I’ve been surprised more than once.
3. Don’t return the new colony to your tank prematurely. If the colony is added too soon (less than three minutes),
you will quickly begin to see your polyps flowing throughout your tank, which brings me to my next tip.
4. Turn off your powerhead & filter for a few hours, otherwise they be blown right off their new home.
5. Finally, if you have a digital camera, or have access to one, try to take a few pictures a week of your new colony.
This is a great way to monitor its progress.
Back to Homepage
 
Book
of Coral Propagation
|


